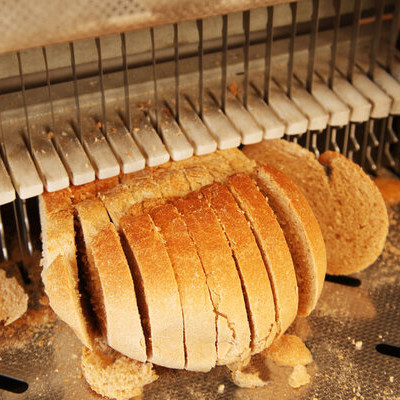
Origin
Slicing bread on a commercial scale was introduced in the 1920s in Missouri, US.1 By 1933, 80% of all bread sold in the US was sliced.
How it works
There are two main types of bread slicers:
Band slicers: are most common in large-scale or high-speed production. They have two rotating metal drums, one at the upper and one at the lower section, that drive the slicing blades. Blades are set in guides known as a latticework. The blades move in a figure-8 motion. the width between them can be adjusted to create various slice thicknesses or serving sizes.
Reciprocating slicers: use fixed slicing blades in a frame that moves up and down. The blades cannot be adjusted for various thicknesses so reciprocating slicers are more common in retail bakeshops. Their throughput is less than that of band slicers.
Application
A few common problems with bread slicing include:
- Misaligned guides which make the slice size and count incorrect. An incorrect slicer guide setting may decrease or increase the number of slices per bag. Too thin slices cause a product collapse during its shelf life.
- Dull or missing blades can be an obvious issue. Blades need to be honed and replaced as conditions dictate. Some inclusions, such as prehydrated fruits, tend to create gumminess, so proper cleaning of blades during changeover time is critical.
- High product temperature after cooling. If product temperature is not within the target of 30–36°C (86–97°F), slicing problems can occur.
Product temperature impact on slicing operation
If loaves are too hot:
- The crumb will be too soft and small pieces of doughy crumb may cause gumming on the slicer blades
- Slice is ragged and may tear (rough surface)
- Sidewalls are weak and may collapse
If loaves are too cool:
- Excessive crumbs at the slicer will result in product loss
- Excessive moisture loss will make the bread drier and firmer
- The bread will not be soft as the consumer expects
- If this is a persistent problem, then higher doses of crumb softening amylase should be considered
Common adjustments to slicers
The slicer settings are different for every variety of bread produced at a bakery. As a result, bakers should use a set-up chart that details the settings for accurate results. Common adjustments include:
- Slice width
- Infeed hold down
- Side guides according to product size (especially loaves length)
- Push paddle timing
Regarding blades specifically, the oilers, honers, replacements, and tension can be adjusted or changed. Regular monitoring and maintenance of all of these factors are necessary to preserve good slicing quality.
Downtime will be necessary when blades are replaced, and the blade tension is set. The blade tension is typically 60–70 pounds per square inch (psi) for a band slicer. If the blade tension is not set correctly, it will shorten the life of the blades, which is costly.
If one blade breaks in a reciprocating slicer, it can be changed/replaced very quickly. Changing out the latticework on band slicers requires a significant amount of time.
Since several settings must be adjusted for each variety of bread, a set-up chart should be created and maintained in the wrapping area. Having each setting correct is important to achieve the correct slice count and quality.
References
- Crockett, Zachary. “The Invention of Sliced Bread.” Priceonomics, 27 Apr. 2021, priceonomics.com/the-invention-of-sliced-bread/.

